
AI photo restoration
Restore old photos with AI photo restoration
You can restore old photos without starting from scratch. Upload a scan, keep the prompt below, and ask the generator to clean dust and scratches, recover faded contrast, and sharpen faces while preserving the pose, clothing, and composition. The best results treat AI as a careful restoration assistant: it should make the surviving image easier to read, not invent a different person, outfit, or scene.
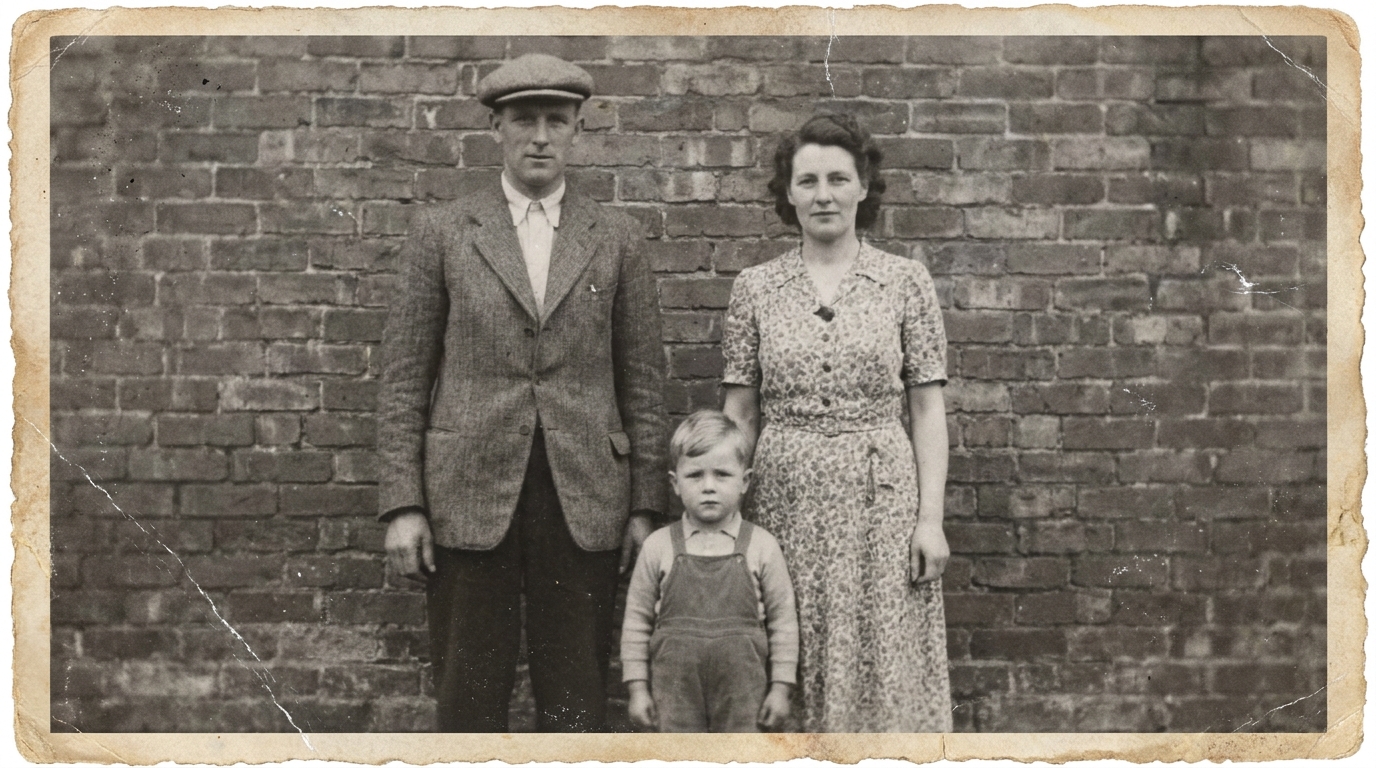
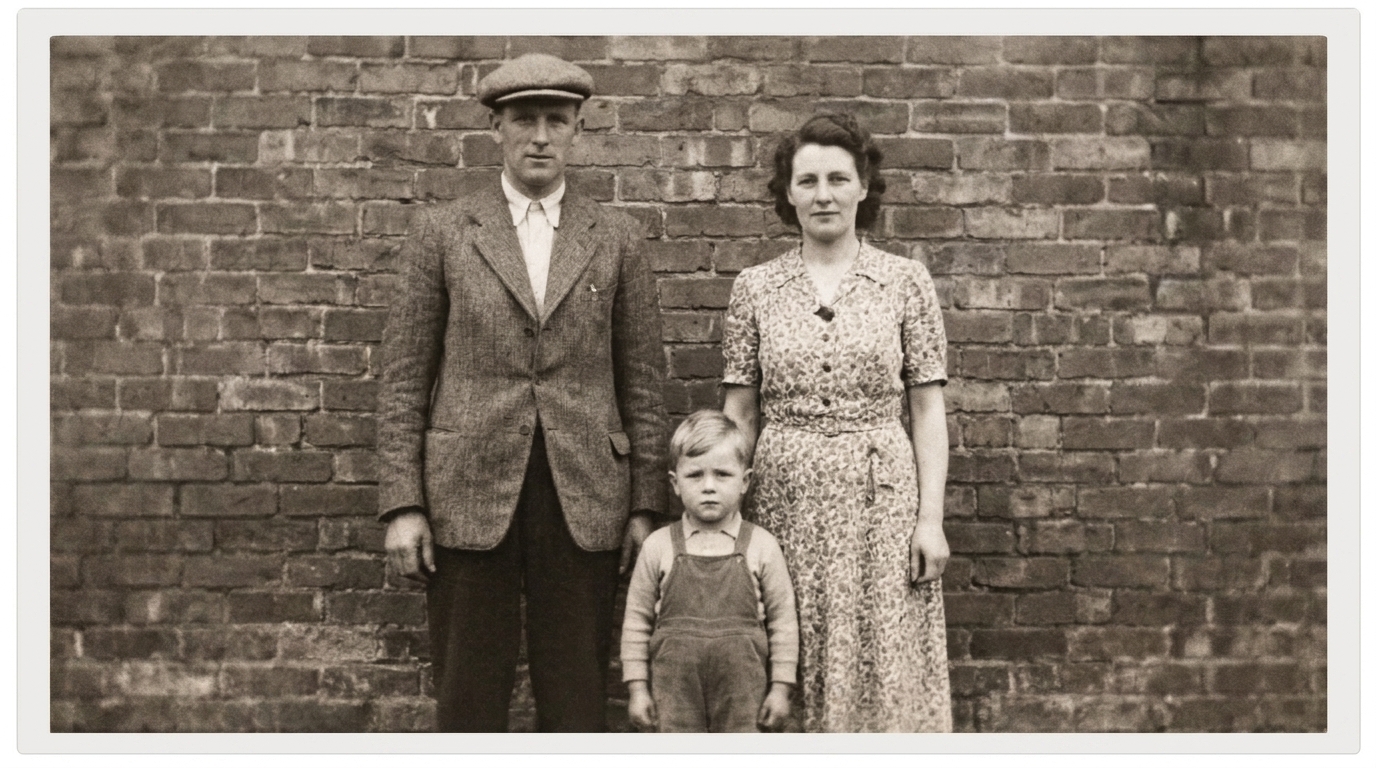
What a restored photo looks like
A restored old photo keeps the original subject and viewpoint, but removes distractions that make it hard to read. Dust, white scratches, foxing, creases, and scanner glare are reduced; faded black-and-white tones regain separation; and faces, hands, jewelry, and clothing edges become clearer without being smoothed into a modern retouch.
Good restoration is conservative. If a hat had a soft edge, it should remain soft; if a background was plain, it should not acquire a new room. When you restore old photos, compare the result at full size and ask whether the added clarity comes from cleaning visible damage or from changing recognizable details.
It also helps to separate the job into layers: cleanup, tonal repair, local sharpening, and optional color. A single file can pass through those stages without losing its documentary character, and you can stop as soon as the people and scene are legible.
What an AI photo restoration generator can do
AI is especially useful for repeated surface problems: small scratches, dust, mildew spots, yellowing, low contrast, and slight blur. It can also help colorize a clean monochrome scan, suggest era-appropriate tones, and recover local detail when the original photographic information is still present.
The limits matter. If a face is gone, water-damaged, or covered by a large tear, the model can only produce a plausible estimate. Keep the original scan, save the restored file separately, and treat generated facial details as interpretation rather than proof when you restore old photos for family history.
How to write a photo restoration prompt
Start with the task, not a vague style: "restore this old photograph." Name the damage you can see—scratches, dust, creases, stains, fading, blur, or torn edges. Then state what must stay unchanged: subject, pose, camera angle, composition, clothing, hairstyle, background layout, and whether the photo is black-and-white or color.
Set a conservative boundary for the model: repair visible damage, improve contrast and clarity, preserve era-appropriate texture, and avoid beautifying, modernizing, or adding people and objects. If one area is delicate, mention it specifically, such as "keep eyes, mouth, and the family resemblance unchanged."
Four photo restoration prompt directions
Use these directions as starting points, then replace the bracketed details with what appears in your scan.
1. Gentle cleanup: "Restore this old photo. Remove dust, light scratches, and surface noise; improve contrast and clarity; preserve the original black-and-white tones, subject, pose, clothing, and background."
2. Faded print repair: "Restore this faded photograph. Reduce yellowing and staining, recover shadow and highlight detail, sharpen edges naturally, and keep the original colors, composition, and period clothing unchanged."
3. Damaged edges: "Restore this old photograph. Repair the torn border and minor creases conservatively, remove dust and scratches, and do not invent new people, buildings, or objects in the missing area."
4. Optional colorization: "Restore this clean black-and-white photo, then add natural, era-appropriate color. Preserve skin tone plausibility, fabric texture, background layout, facial features, and the original pose; do not add makeup or modern styling."
How to get more natural restoration results
Start with the best scan available. Use a flatbed scanner when possible, clean the glass, scan at a high resolution, and keep the photo straight. If you only have a phone image, avoid heavy filters and shoot evenly in indirect light so the model can distinguish damage from shadow.
Run a mild restoration first. Compare eyes, mouth, hairlines, signatures, and fabric patterns before accepting it. If the result looks plastic, revise the prompt to reduce smoothing or ask for less contrast. If scratches remain, run another pass or describe that specific damage. Always keep the original and a version labeled "AI restored".
Make a short checklist before you export: no new jewelry, no changed facial proportions, no altered doorway or window, no invented text, and no unexpected modern object. Crop only after restoration, and save a full-size master. Those few minutes make it easier to restore old photos consistently across an entire family archive.
Restore your old photos
Add your scan, use the pre-filled restoration prompt, and describe the one thing that matters most—faces, torn edges, faded tones, or a family group. The generator will keep the prompt editable so you can adapt it to each photograph.
Then review the restored old photo beside the original. The strongest result is not a new picture; it is the same memory made clearer, with the evidence of age treated respectfully and the people still unmistakably themselves.